3. Task and time tracking
- 3.1 How to create a task
- 3.2 Task detail
- 3.3 Operations with task
- 3.4 Time tracking
In the previous chapter, we have gone from project level upwards to the portfolio. Now, it’s time to move a step deeper – to the task level.
Tasks are the most used entity in the whole of Easy Project. Work should primarily be passed via tasks. Which may lead you to think: "If the tasks are so important, why are they at the end of this guide?"
It was necessary to at least read about the configurations (for example Workflow), so now you can understand the following operations in full context.
3.1 How to create a task
There are lots of ways to create a task in Easy Project, to make it as convenient as possible for all your users’ preferences.
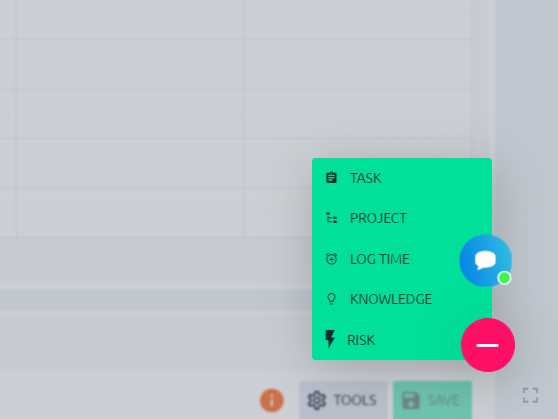
Green NEW button
The button is always available, no matter where in the application are currently are.
Quick project planner
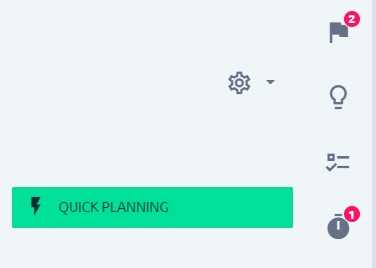
If you enabled the module Quick project planning on a project, go to the project overview where you will see a green button on the right side.
Selection of fields visible in quick planning is configurable in project Settings > Quick planning. The tasks are created by hitting the Enter key.
Gantt
Easy Gantt on a project level allows to create tasks by dragging in the chart.
To-do list
If you are located within a project, you can drag an item from your to-do list into the highlighted area.
Keyboard shortcut
Alt + Shift + N takes you to the new task form.
WBS
WBS (Work Breakdown Structure) is the best tool for creating project and tasks structure.
3.2 Task detail
The task detail is comprised of various sections.
The header and attributes
Naturally, the most prominent position is taken by Subject (task name), with an avatar respecting the current Assignee. Below which you will find attributes such as status, assignee’s name, priority and due date — these are the most important attributes that are always shown. Underneath the +More toggle additional attributes are hidden (such as task type, estimated time or all custom fields).
The application remembers the last state of the header (expanded or collapsed), so every other task you visit will be shown like the last task you viewed.
Sidebar
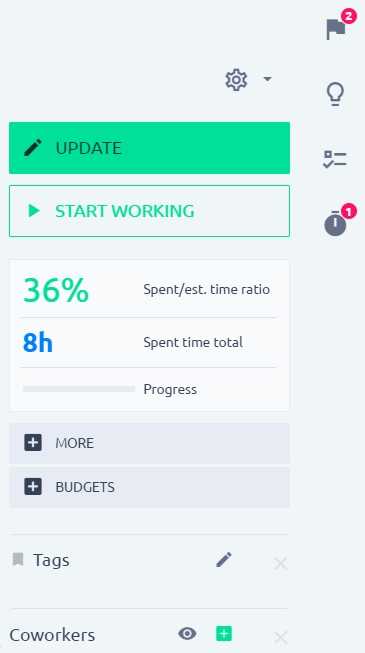
The right sidebar contains important progress and evaluation info, Update button and task operation buttons. As well as a list of co-workers — users who may not be assigned to the task but receive notifications from updates and for whatever reason are involved.
At the very bottom of the sidebar, export buttons are located.
Attachments and related entities
Beneath task attributes, you may witness various sections showing items related to the task (attachments, related tasks, parent/sub-tasks, contacts, knowledge posts, etc.). All of these sections may be collapsed not to take too much space.
History, comments, spent time
Last but not least, the full task history unfolds. It is split into sections.
- Comments
- Spent time — the table here is hardcoded (to view configurable time report of the task, click on the Spent time total in the sidebar).
- History — all updates/changes on the task.
If the task has too many changes/comments, you will only find the last 10 updates on the first load of the task. To load all changes, just scroll down and hit Show all. This restriction is for the sake of quicker task loading.
3.3 Operations with task
All these operations are from the application perspective quite intuitive, so there is no reason to explain how they work. But it does make sense to explain, which peripheral factors determine the behavior (such as permissions, global settings, workflow).
Quick task editor
There is a more compact, interactive, mobile-friendly view of a task detail, which also allows performing all operations with the task. This view is going to be continuously optimized to make work with tasks as smooth as humanly and technically possible.
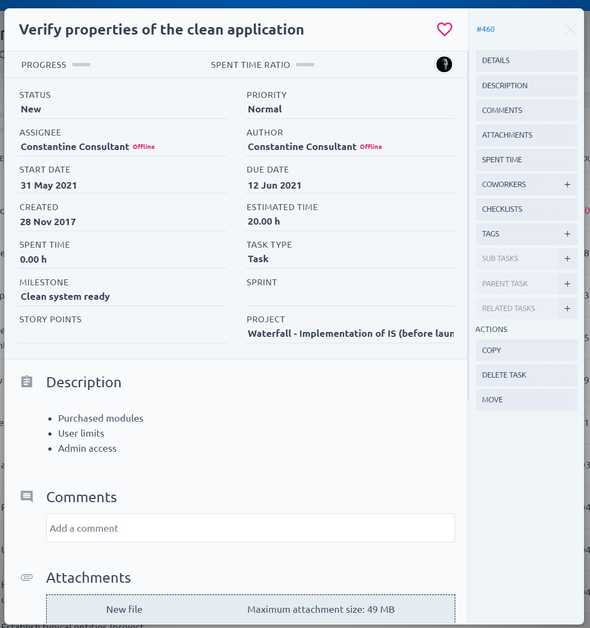
Its main advantage is that it works without necessity to refresh the page or jump to a different tab on your browser. It can be accessed by following ways:
- In task list hover mouse over a task and on the right side you will find a special button.

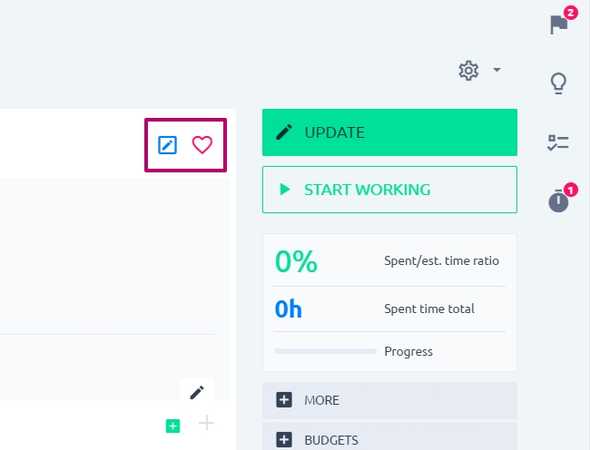
- On task detail – button on top right of the task header
- In WBS via Edit button
- In Scrum/Kanban board — click on the task card
- In Scheduler – it is the default task view
Update
Task update is the most used operation that includes changing attributes, adding comments, but also logging time.
The amount of attributes and options you see is determined by workflow (some may be read-only), special visibility of custom fields, permissions (e. g. disallowed to add a comment), disabled modules on a project (e. g. time tracking). These are the places you should investigate if your users have problems with task editing.
Attempting to save unpermitted attributes (e. g. due date after project due date, unfilled required field, or similar) will result in an error that will be descriptive to tell you where to look for the solution, or simply to tell the user what they did wrong.
Updating task attributes can also be done from the task header (without clicking the green Update button), by using the pencil button. Not all attributes are editable this way and some updates may result in an error. For example, if you attempt to change the status, but workflow dictates that in that new status, you need to fill in some other field. Again, these kinds of errors will be descriptive.
Logging time
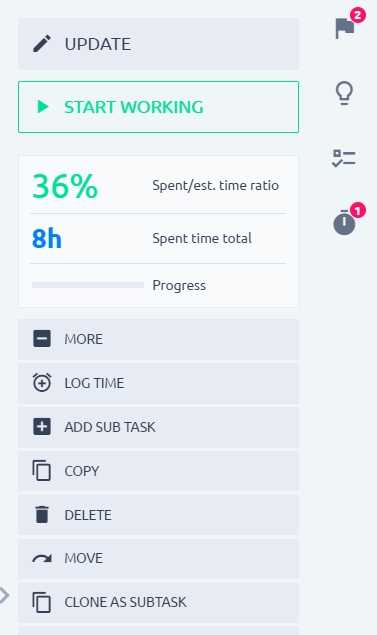
Apart from logging time via task update, you can do so via a special button under the task operations in the sidebar (More > Log time). It is a quicker way in a pop-up window.
Task timer
The related settings to this feature are explained in Chapter 1.5.4. Hit the Start working button in the sidebar to start the timer. Pause when you need to divert yourself to a different task and leave this one be for a short while. Finished when you are done, which will take you to task update and confirmation of the measured time.
Start working button is also available in the context menu — task list, right-click.
Add subtask
By clicking here, you will be redirected to a new task form (as when you are creating a regular task). The field Parent task is prefilled.
A common issue with this feature is that when you use a task type where the field Parent task is disabled (Chapter 1.4.2), it will not create a subtask. Which then looks like the button is not working.
Add subtask is managed by permission Create tasks.
Copy
This operation takes you to the new-task form, where attributes are prefilled from the original task. You can change them as you please. There are also options to keep a relation (link) between the original and the copy; to copy attachments from the original.
Copying is managed by permission Copy tasks.
Delete
Just a reminder from more of the previous chapters — do not allow users to delete any entity. It will destroy the entry in the database, and you would need to search through your data backup to find any information about that task.
Delete is managed by permission Delete tasks.
Move
Almost identical to the regular task update, but with added field Project, where you may select a new project for this task = move it.
The move is managed by permission Move tasks.
Clone as subtask
A combination of Copy and Add subtask, i.e. copy attributes from original + prefill the field Parent task.
Merge
If it is common in your organization to have duplicate tasks for the same subject, you may want to use the merge function. You would choose another task into which you want to merge this task.
As a result, the current task will be closed (into the first closed status, according to the status order (Chapter 1.4.3). All comments from the current task will be included in the history of the chosen task. Description of the current task will be added under the description of the chosen task (with a note that this part is taken from a merged task). Attributes are kept from the chosen task.
Task merging is also possible in a task list. Select more tasks from the same project, right-click, choose Merge to. This is especially useful for merging more than two tasks.
Task merging is managed by the permission Edit tasks. There is no separate permission for that operation because it is nothing more than just specific changes in the concerning tasks.
Add related tasks
With this button, you can link tasks to each other.
This functionality is managed by the permission Manage task's relations.
Co-workers
A coworker is a user who has some kind of interest in the task. The user would receive notifications from the task. In case of a strict task visibility policy, this is the way to show the user a task, that is not assigned to them.
By clicking the eyeball button, you will add yourself as a coworker. By choosing "+" you will select other users or whole groups. Behavior of groups in co-workers follows the same logic as in the project memberships (Chapter 2.2).
Bulk edit of tasks
A variety of operations can be done in bulk on a task list.
Go to the task list, select multiple tasks and right-click.
The available operations are based on your permissions, workflow and whether they all belong into the same project. By clicking edit, you will go to the task update form (where you can change multiple attributes at once).
However, because there are more tasks being changed at once, there is a greater chance that you will attempt a forbidden operation. In such case, all tasks that contain only allowed changes will be saved, while tasks with at least one problem will be listed and every error will be explained.
3.4 Time tracking
In the decision whether this chapter should have been on the top level, or not, the winning argument was that time tracking is, in fact, one level lower than tasks, i.e. PROJECTS > TASKS > TIME ENTRIES. Therefore, time tracking is a sub-chapter covered under Task tracking.
3.4.1 How to log time
Here is a summary of the options to log time. We need to remind you that in order to be able to log time to a certain task/project, the module Spent time must be enabled on the project (chapter 2.5).
Task update / quick task editor
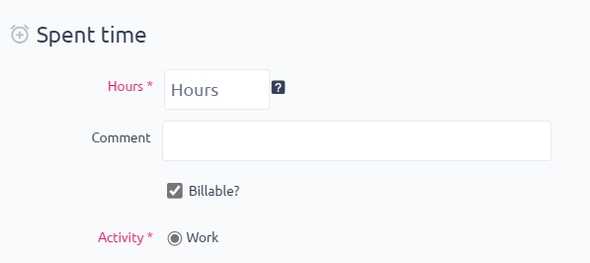
When updating a task, there is a section dedicated to time logging. Please be aware that this section does not update any task attributes – it is not a task update per se. Also, a comment added to a time entry is not shown in the task comments, it is just a note for the specific time entry.
Button on task detail
As mentioned in the previous chapter, when you are on the task detail, you will find the Log time button under More menu.
Context menu on task list
On any task list, right click, Log time.

Green NEW button
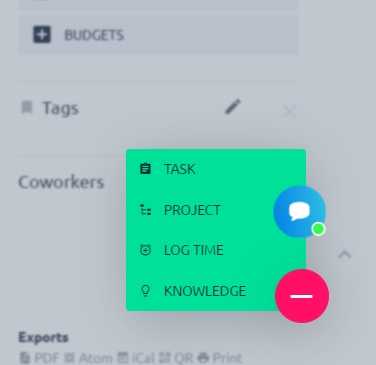
If not available in the submenu, it is because the user has disabled permission to log time and/or the currently shown project has the module Spent time disabled (chapter 2.5). Otherwise the item is always visible.
Task timer
This method was explained in the previous chapter, as well as chapter 1.5.4. It is the most precise way to measure time.
Home page — spent time calendar
When setting up a home page of your users (chapter 1.2.5), you may choose the module Spent time calendar to put in a prominent sector. It will show the user how much time they logged while indicating whether they have reached the number of prescribed hours (green or red) from the working calendar (chapter 1.2.6). It also allows logging time.

Timesheets
Go to: More menu > Timesheets
Timesheets are a specific form of logging time in bulk, but they still use the exact same standard logic of logging time as the rest of the application. Every time entry requires project, task, and date. Logging and editing time entries in a timesheet requires necessary permissions and follows limits from global settings (chapter 1.5.1).
Detailed technical documentation: https://documentation.easyproject.com/easy_knowledge_stories/78
3.4.2 Possible issues
Time tracking was explained in detail in chapter 1.5, but we will give you a brief summary to refresh your memory.
Activities
You cannot log time without activity, it is a required attribute of a time entry. If your users don’t see any activity, you should check the settings of the project where they are attempting to log the time (Project > Settings > Activities (spent time). Either there is no activity enabled, or the activity should be prescribed on the task, but it isn’t.
User preference
There is a user setting that was not mentioned before. Every user, on their profile, is able to set whether they want to log time by entering the number (e.g. 1.5 h) or by range (e.g. 10.00—11.30).
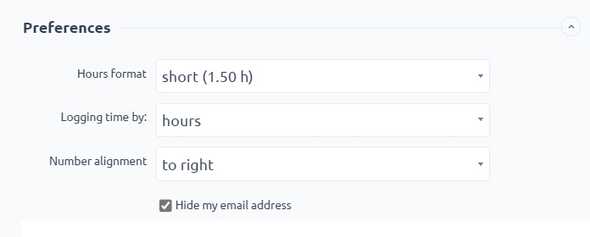
If users choose to log time via range, there is a global setting that determines whether the times are entered manually or selected from a dropdown list. The setting is in Administration > Settings > Spent time — Show from/to range as selection (when logging time by range). In that case, the times to select are by quarter hours, i.e. 12.00, 12.15, 12.30, 12.45.
3.4.3 Time reports
Obviously, the main purpose of time tracking is to generate all sorts of reports for internal or external use. Where will you find such reports?
Main report page
Go to: More Menu (Top right) > Task reports
The dashboard is preset in a default state, which you will most likely have to adjust based on your needs. Nevertheless, this page shows you some reporting capabilities and various forms/outputs.
Here is at least an explanations of their purpose and recommended use, while more details about the configuration are in the knowledge base articles listed at the end of this chapter.
- Trends – a trend shows a resulting value based on any data set in the application, with the possibility to compare it with the value from the previous period.
- Gauge – is used to show fulfilment of a certain target. The target may be fixed (set manually), or dynamic (based on a resulting value from a defined data set).
- Charts – the three most standard chart types (bar, line, pie) are a necessity. Both X and Y axes are, of course, configurable to show exactly what you need.
- Pivot table – called in the module selection as Report is, again, fully configurable.
- Lists – in spent time, the list is not as used, but in case you need to dig deep, you are able to filter out particular time entries in a list.
- Global filters – (at the top of the page) these are filters that are applied to all modules that are connected to them, and therefore you can control the shown data on the whole dashboard by setting these filters. They are fully configurable.
Personal statement (report)
Personal statement is a specially arranged view of spent time for a single user for themselves. It can be accessed via More menu > Time reports > Personal statement – on the right menu of the Main time reports page.
On the first page, you will find the filterable list, which, again, may be used for chart views, as well. You, as an administrator, may prepare some saved filters for your users so they won’t always need to prepare the reports ad hoc. This is where they would find the filters and generate their reports with one click.
On the second tab, called Report you can build pivot tables. How do these work? It is very simple, just: 1) Verify the filters; 2) Choose the time detail; 3) Choose attributes to group the report by. There can be any number of attributes.

Spent time on project
By clicking on Spent time item in the project menu, you will practically get into the same type of reports, but for all spent time on the project. It may automatically include subprojects (based on setting in Administration > Settings > Task tracking — Display subprojects tasks on parent projects by default). If this setting is disabled, you will need to select subprojects via a filter.
The same applies as above, on the list, you can make any types of listing or chart reports, on a report tab you can get a pivot table.
Don't forget that project also has its own dashboard — the project overview page, where you can also add spent time from the filter module for various reports.
Detailed technical documentation (graphs and charts; filters): https://documentation.easyproject.com/easy_knowledge_stories/82 https://documentation.easyproject.com/easy_knowledge_stories/28
Detailed technical documentation (global filters): https://documentation.easyproject.com/easy_knowledge_stories/53
3.5 WBS - Work breakdown structure
We are reaching a point where we could end the manual, because you are now familiar enough with the most essential Easy Project functionality and the rest is described in more detail in the online documentation.
Nevertheless, it would be a shame if we omit at least a couple of words about the three pillars of modern project management, which are built on top of the task/time tracking logic of Easy Project.
Starting with WBS, because it comes into play right at the beginning of project planning. WBS is a tool for task creation in a visual and structured way. From the user perspective, it acts like a mind map of the deliverables and tasks of the project. The advantages of using WBS compared to, say, adding tasks into a table obvious.
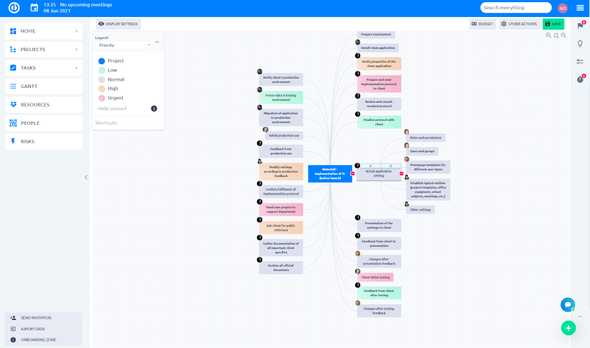
From the technical perspective, for you – the application administrator – it is important to remember some key specifics to ensure seamless use of WBS by your users.
- Allow the field parent task on task types – we discussed enabling/disabling fields per Task type in chapter 1.4.2. If the field is disabled, you can’t create a subtask, because it is in fact defined by value of its field parent task.
- Workflow restrictions – be careful about any workflow restrictions (chapter 1.4.4) on task creation or editing. WBS allows to use drag and drop to change the task structure, but also task attributes, such as priority, assignee, etc. If workflow prohibits the user to make some changes, they will only be validated after clicking Save. Which means, the user may lose invalid changes and also some of the valid ones that were affected.
- Autosave changes – even if you don’t click on Save manually, WBS will be automatically saved when: A) User leaves the browser tab with WBS; B) User opens quick task editor; C) After a few minutes of inactivity.
Detailed technical documentation: https://documentation.easyproject.com/easy_knowledge_stories/43
3.6 Gantt chart
There is no need to explain the meaning of Gantt chart in project management. But again, like WBS, the Gantt is also a drag and drop component on top of task logic in Easy Project. Therefore, similar rules apply, and you should keep them in mind.
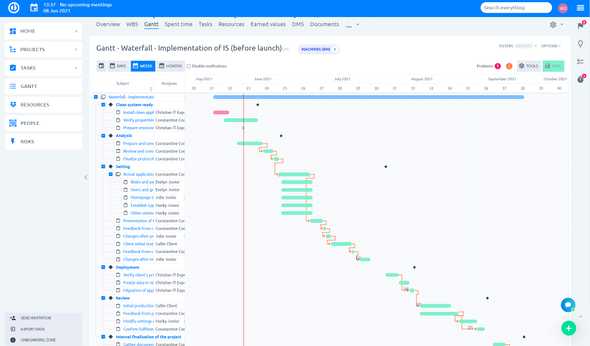
Be careful about workflow rules for users/roles who work with Gantt. The user may prepare a great project plan, but after save, many errors may pop-up.
Default sorting of tasks in Gantt is chronological – earliest are above the later ones. Naturally, parent-sub task structure as well as milestones are also taken into account (earlier task belonging to a milestone with a later date is shown lower than a later task belonging to a milestone with earlier date).
Finally, to translate into technical terms, moving tasks in Gantt practically means changing task attributes – start and due date. By clicking on the task name in Gantt, you will open the quick task editor that is also used to change task attributes. The changes have to be saved in Gantt by clicking Save to take effect in the system.
Detailed technical documentation: https://documentation.easyproject.com/easy_knowledge_stories/20